Well, I’m back with another card, but I need to tell you that I improved on it in my card class on Thursday night! So … if you watched last week’s YouTube (published yesterday), “they” don’t know the secret, but you will!
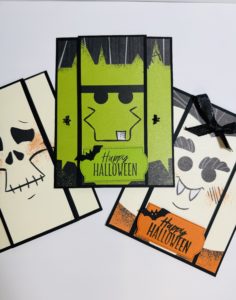
These are super-easy cards, especially if you can make simple cuts following my directions! I made 3 cards, all using the “oh-so-fun” Spooktacular DSP. Yes, I realized just before my FB live that the paper is sold out. If you place an order in my store, I’ll send you a card kit to make all 4 of the funny-faced Halloween pals! That’s right! I have 2 packs left and I’m willing to share with you! Just place a $30 order in my store (it can even be adhesive!) and I’ll send you the card kit and the 4 different pals!
So, let me tell you how I told you to make it on the video (and you’ll see the results of that in my Frankenstein card) and then I’ll tell you an even better way!
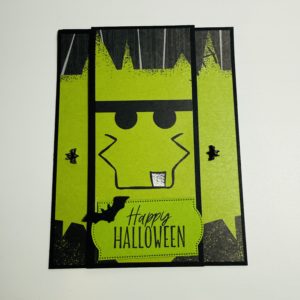
This was my first attempt to make this card and it turned out cute with some “interventions” but not what I was looking for. I found a cute card in Pinterest shared by Rachel Tessman. It was a standup card with 4 score lines — in other words, her cutting directions (which I shared on my FB live last Monday) were perfect for her card but not for mine! (*Again, I loved Rachel’s cards and her directions but it didn’t work with THIS card style.)
I explained in the video that you should cut out 3/8″ off the top and bottom (both – perfect so far!). Then, she instructed that you cut off 1/4″ from each side (scrap to use or discard), then cut off 1-5/8″ from both the left side and the right side.
You’ll notice in my card above that it is on a 4-1/4″ x 5-1/2″ Basic Black base. I then added a 2-1/2″ x 8-1/2″ front card that I scored in half at 4-1/4″. That’s where my problem started. I added the 1-5/8″ pieces to both the left card base and the right card base … by adding that Black mini card on top, it covered up Frankenstein’s “bolts”. I improvised (successfully, IMHO I might add!) the bats positioned sideways from the Dots, Bats & Ghosts adhesive-backed embellishments. Cute, right?! Luckily, my Frankenstein’s hairline was straight and it otherwise worked.
Check out another view here:
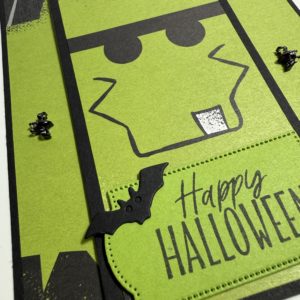
The tag is a die cut from the Web of Fun dies but I had to alter it. I cut out a full-size label, stamped my sentiment in the left or right side, then put the die cut back inside the die, custom-sizing my label. Is that clear as mud?! I think I explained it on my video so I’ll post the video below for your information. If you fast-forward the video to about 18:30 mins, I explain the process. Of course I had to add a die cut bat from the Oh My Fright dies.
Check out the inside:
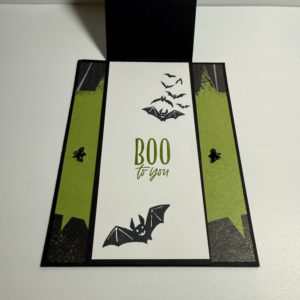
I stamped the cluster of bats in the top right corner, the single large scary bat in the bottom left corner, then stamped the sentiment in Granny Apple Green ink in the center.
Here are the measurements:
- Card Base (Basic Black): 4-1/4″ x 5-1/2″
- Mini Card (Basic Black): 2-1/2″ x 8-1/2″, scored at 4-1/4″
- DSP card base: 1-5/8″ x 5-1/4″ (from each side after cutting off 1/4″) – see details above
- DSP mini card: remaining 2-1/4″ x 5-1/4″ (after cutting 3/8″ off the top and bottom, and after using the 1-5/8″ pieces for the card base as above)
- Inside (Basic White): 2-1/4″ x 5-1/4″
Let’s check out another card I made using the same measurements above, this time making “Miss Vampire”.
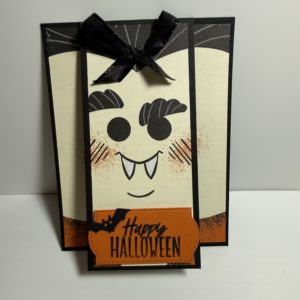
Follow the same directions as for Frankenstein above and you’ll have the same results! This time, I used Pumpkin Pie for my “custom label”. I added a cute Black 3/8″ Iridescent Ribbon bow. If you like this ribbon, run … don’t walk to my store. It’s on low inventory now and I’m not sure if they’ll replace it! Like I said, this one worked out perfectly on my hairline using Rachel’s directions as I stated above.
This is my inside:
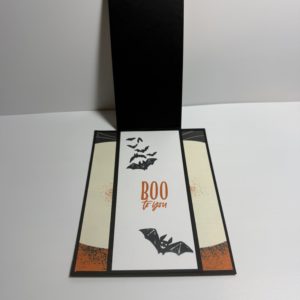
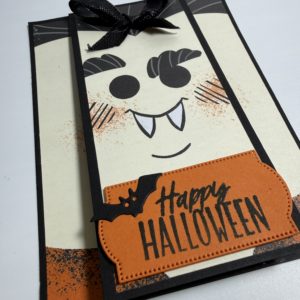
I forgot to tell you one more thing! I love bling! I love glitter, I love shiny gems, I love Wink of Stella! I added some Wink of Stella to the vampire fangs … and to my Frankenstein tooth too!
Here’s another closeup:
Now, to get to the good stuff!
Here are the next 2 cards. The card on the left is done following the directions above. The card on the right uses my new method!
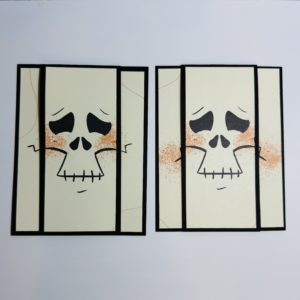
They look pretty similar, don’t they! Let me show you a closer view of each, and then I’ll tell you how I made it!
This is the card on the left, made using the above measurements:
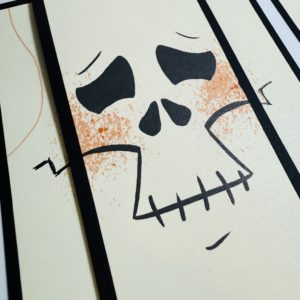
If you look very closely, you’ll see that I had to “hand-draw” the smile with the Black Journaling Pen. If you choose to make the cards this way, this is a great use of the journaling pen!
Now check out my card below.
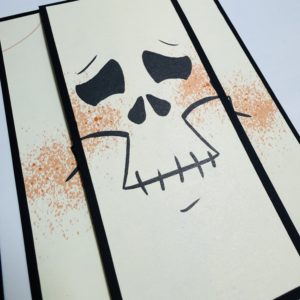
Here’s how to do it now, including the measurements and instructions:
- Card Base (Basic Black): 4-1/4″ x 5-1/2″
- Mini Card (Basic Black): 2-1/2″ x 8-1/2″, scored in half at 4-1/4″
- DSP for Mini Card: 2-1/4″ x 5-1/4″ — cut 3/8″ off the top and bottom of the DSP, then cut off 1-7/8″ from the left side and then the right side. Next, cut 3/4″ from the inside of the left side and the inside of the right side — this is what makes the continuous facial features. You can discard the remaining strips or save them for card insides!
- Inside Mini Card (Basic White): 2-1/4″ x 5-1/4″, stamped as desired.
And there you have it! My secret to creating this card and NOT losing Frankenstein’s bolts! Thanks for visiting! Please leave me a comment and tell me how you found my post!