I did my Facebook Live last night and featured 3 cards made with the Thoughtful Expressions bundle. I added a bit of interest though by doing the Stack & Shuffle method. Doesn’t that sound like a country line dance or something?! That’s the first thing I thought about.
You can do this stack and shuffle method any way you want. I chose to make my cuts uniform and easy to duplicate. The trick is to do 3 pieces of paper at the same time. You probably don’t want to use paper thicker than designer paper since you’re cutting all 3 pieces together.
Here are my cards from my Facebook Live. (I’m going to link the YouTube video later in this post too so you can watch and duplicate the cards.)
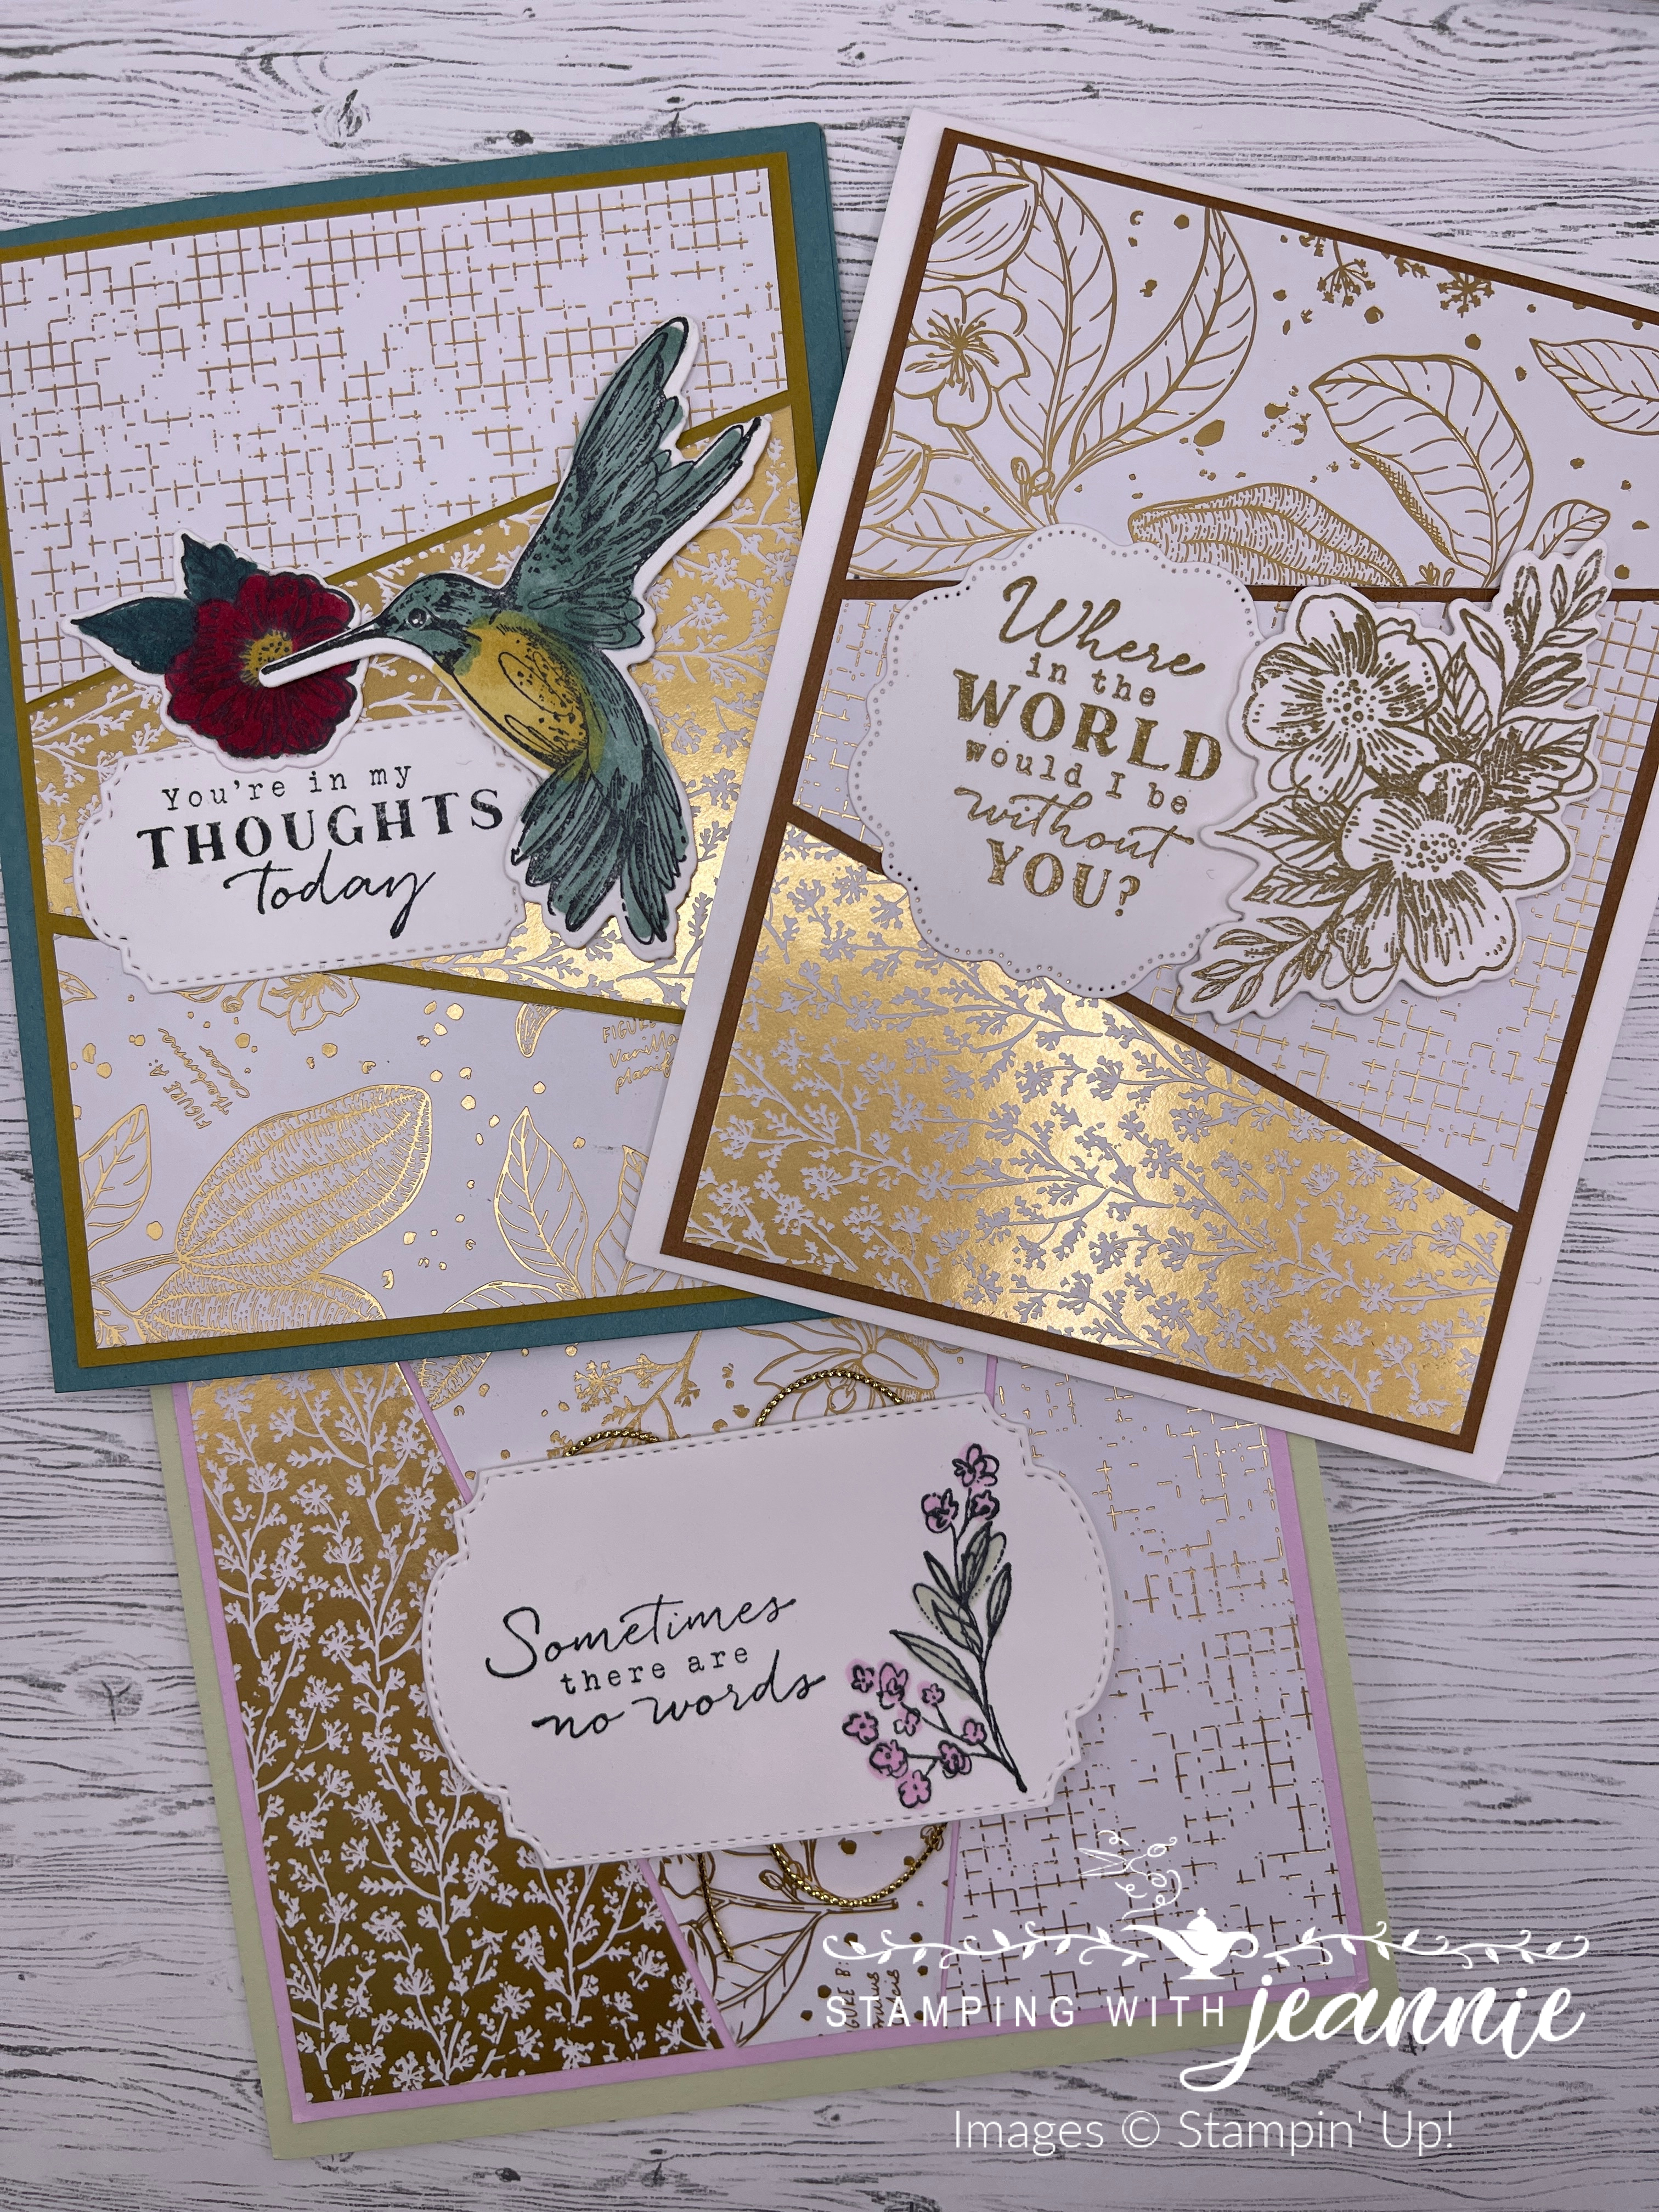
As you can probably see, I chose a specialty DSP for the cards. I used the lovely Nature’s Sweetness Specialty DSP since I just LOVE the gold accents! It’s not great for photography, but it sure is lovely for real!
The trick is to stack 3 pieces of DSP together — make tic marks on the top piece (make sure you can erase the marks). Then, cut all 3 pieces at the same time (so they’ll match) I’m including a sketch of how to cut the paper — it’s really very simple.
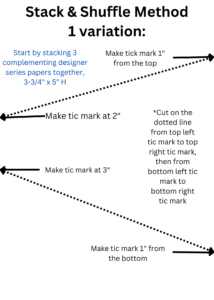
If you make the cuts as I indicated, stacking all 3 sheets of DSP together, you are left with 3 different piles of DSP cuts. Now, the fun begins! Move to the middle pile, taking the top DSP piece and moving it to the bottom of that pile. Move to the bottom “pile” and move the top TWO pieces of DSP. You will be left with 3 piles of DSP for top, middle and bottom cuts. Make individual card piles, taking the top of each section and attaching it to a cardstock mat.
The mat you cut to layer on the cardstock pieces is going to be 3-7/8″ x 5-1/4″. The usual layer would be 3-3/4″ x 5″ or 4″ x 5-1/4″, but because you are “spreading apart” vertically, you need only the height to be longer.
This is where I’m going to insert my video. My instructions above seem “clear as mud”!
Hopefully you have a chance to watch this and let me know what you think? It’s a fun technique and easy to learn. If you look at my cards, you’ll see that I took one of the matted cards and flipped it on it’s side.
Check out my other cards:
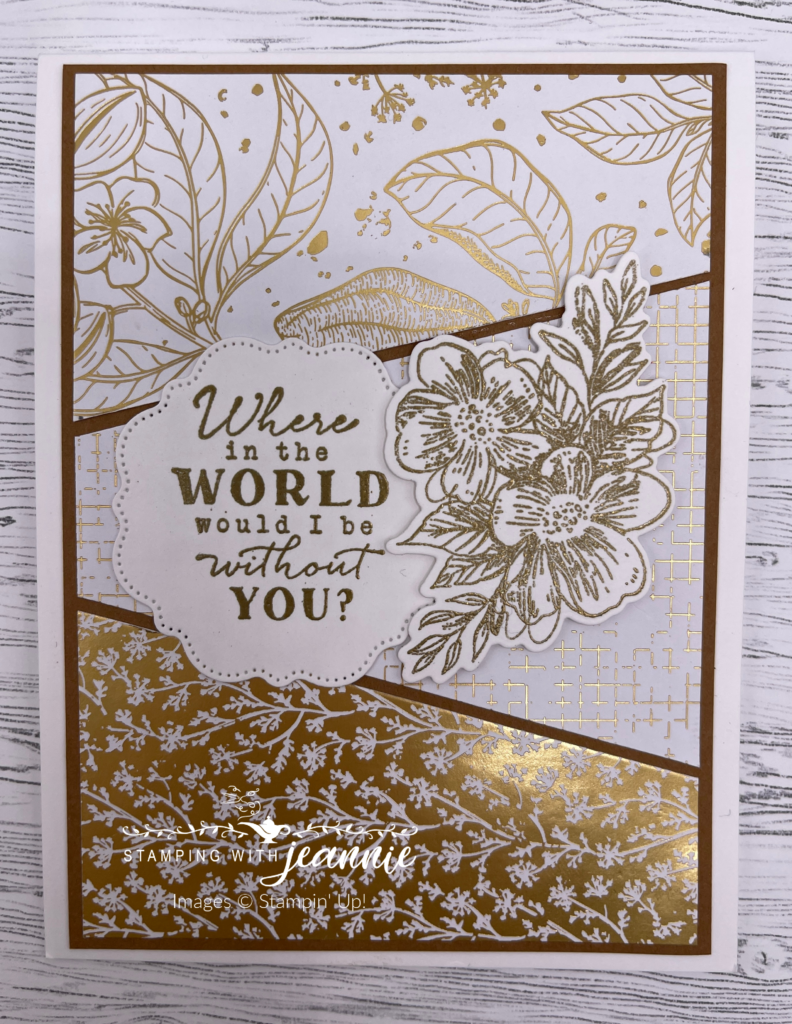
Isn’t it beautiful with all of the gold? I wish that the gold embossing was shinier. It is unfortunately more of an antique gold than a bright gold. We need our gold metallic pads back for that!
Here’s another look at it. I matted the 3 pieces of DSP on a piece of Pecan Pie CS that is 3-7/8″ x 5″, with the base either 4-1/4″ x 11″ scored at 5-1/2″ or 5-1/2″ x 8-1/2″, scored at 4-1/4″. How you cut and score is entirely up to you!
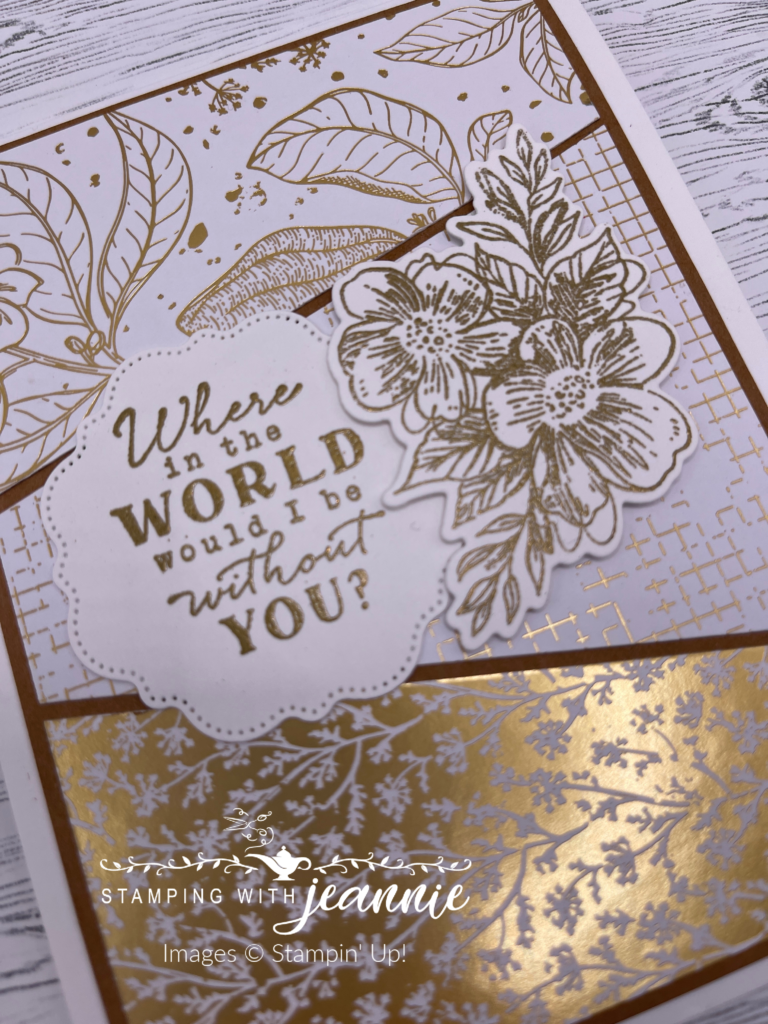
This is one of our beautiful Thoughtful Expressions dies. My hope was to promote it before it retired, but alas, it is out of stock, with the return scheduled for April 30th. My hope is that they will make it available online since obviously it will be missed!
I’m thinking that this would make a great anniversary card for my hubby, or maybe for a best friend or neighbor that you just “can’t live without”?!
Here’s the 2nd card. Notice that the top piece on the first card is now in the middle of the next card. But, I also flipped the card on it’s side, making it look completely different!
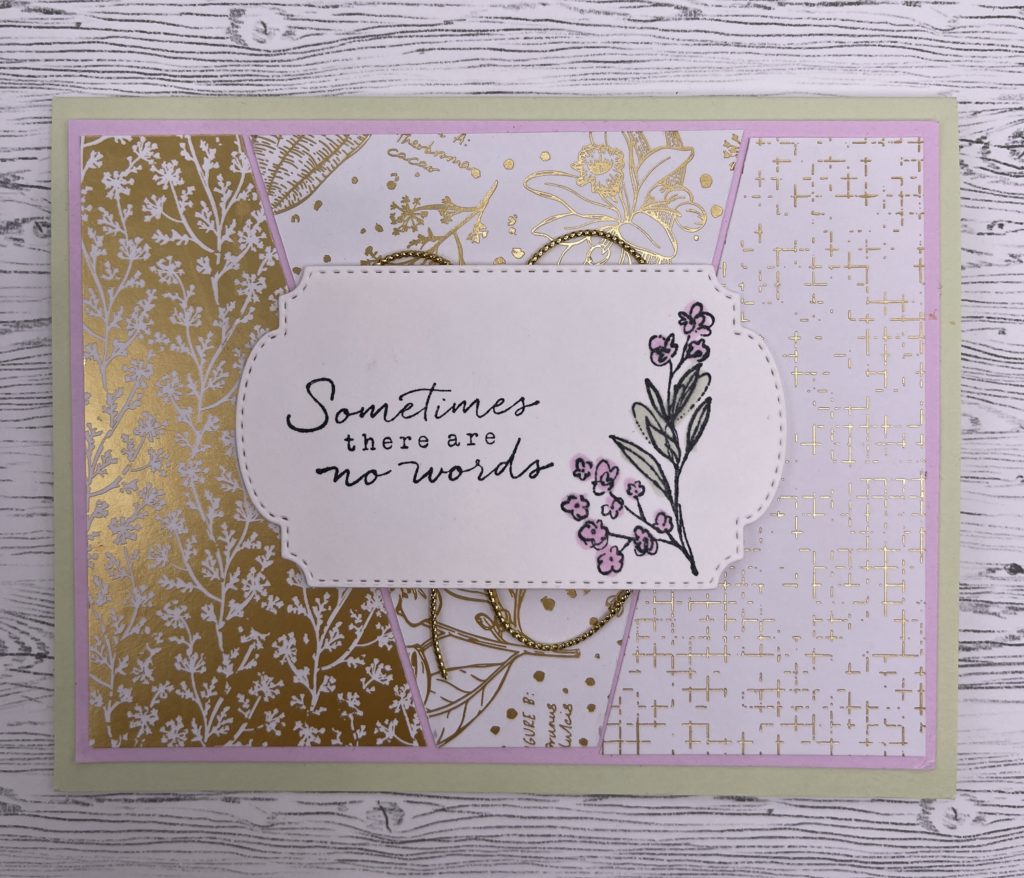
I chose the 2nd largest rectangular label for my diecut this time. Rather than diecutting the flower sprig, I stamped and colored it directly onto the label. I stamped in Memento rather than embossing this time.
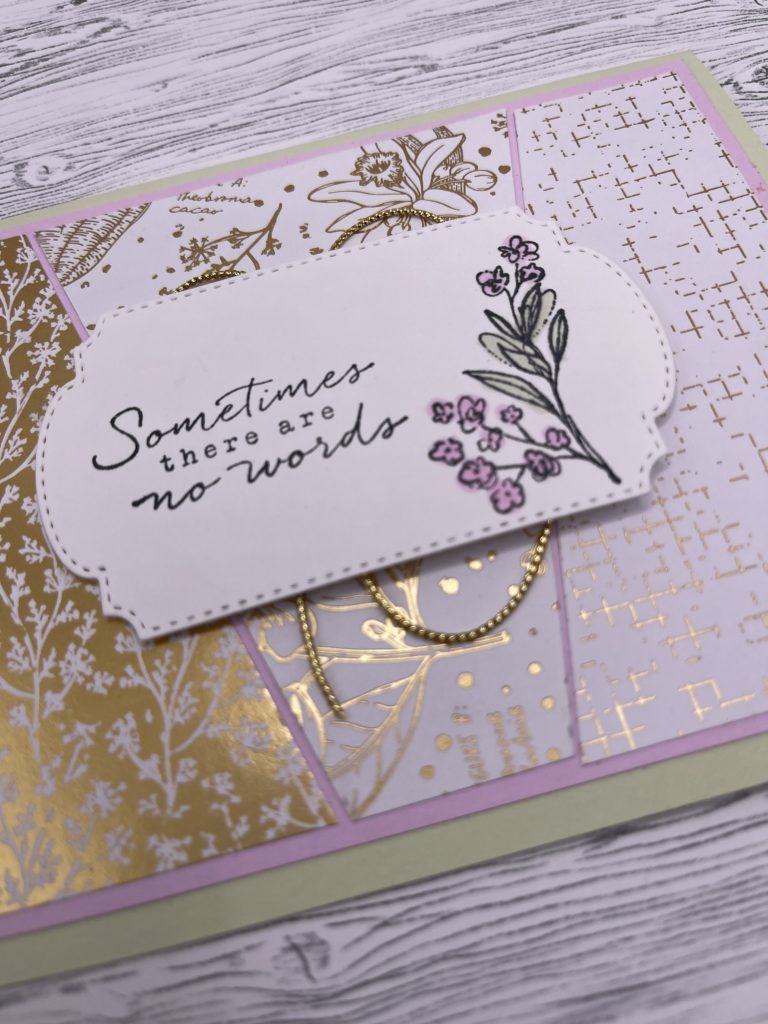
I added a little bit of Essentials Trim under the label — it seemed plain without it. My CS mat, again 3-7/8″ x 5-1/4″ is Bubblebath, and the card base is Soft Seafoam. I colored the flowers with the same color blends: light Bubble Bath and dark Soft Seafoam I believe. I think that this card would make a great sympathy card, don’t you?
My 3rd card shows the DSP pattern that is top on the first card, now in the bottom position.
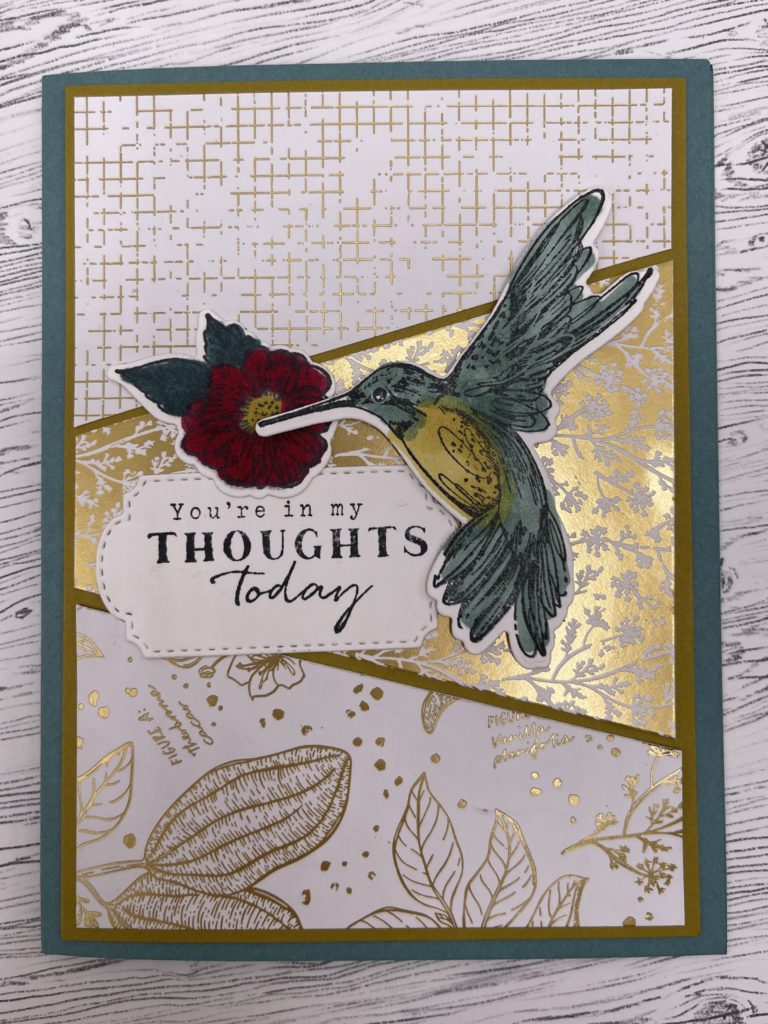
The hummingbird is one of the images in the Thoughtful Expressions stamp set — the hardest part truly is coloring it! I decided that this little guy may not be true to life colors. I colored him with Lost Lagoon (both light and dark I think?) and the Wild Wheat blends. My favorite part is where the Lost Lagoon and Wild Wheat color blends on the belly/wings. When you’re done coloring, there’s a die for that!
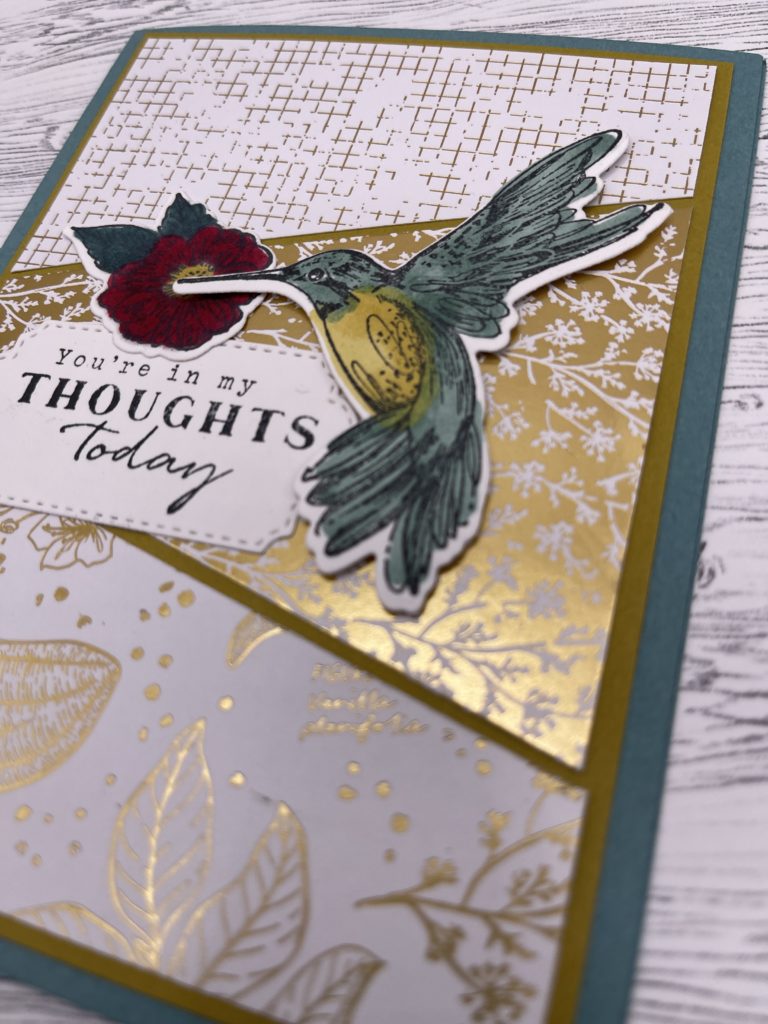
I made my flower Cherry Cobbler, again with a Wild Wheat center. It’s a bit dark, but I think I like it? You could also make the flower brighter if you’d like. Yes, the beak of the bird is not in the flower center. I had to hide a blunder — I smudged some Memento ink onto the right side of the label. That was lucky, because I was able to hide it with the tail of the hummingbird. Can you imagine if I did it on the left side? I don’t think I could have fixed it!
Don’t you love the Wild Wheat — I have to say that this In Color last year was NOT my favorite. I know what people think of when they see the color by itself. But … put it next to gold and it accents the gold so well! Wow!
My card base is Lost Lagoon, and as above, I matted the DSP with Wild Wheat.
Hopefully I’ve shown you that this is a great simple way to make 3 cards! Try it. Switch up the DSP — make it complementing colors, use different patterns from the same DSP set. There are so many options!
If you do try it, I hope you’ll share with me! Leave me a comment and share with me!
By the way, there’s a supply list down under this post. Like I said above, you can’t order the dies right now, and I hope they really DO come back the end of April. I hope they’ll change their minds and keep them online! I love the dies and I’m sure you will too!

<div><div><div id="18789bb4-adb5-4be1-8ab8-45a1f7d9d944"><iframe class="iframe-showcase" src="https://mystampinblog.com/Showcase/Details/c26c3be7-4f5a-4d94-a58a-b0701c185f47?layout=Tiled&showSku=True&showPrice=True&showSalePrice=True&showAddToCart=False&showAddAllToCart=True&showDownload=True&transparent=False&bordered=True&hFontHeight=14&rFontHeight=13&imageHeight=120&middleContent=False" frameborder="0" scrolling="no" allowtransparency="true" loading="lazy" style="width:100%"></iframe></div><script src="https://mystampinblog.com/Script/ShowcaseDetailsScript"></script></div></div>