On my Facebook Live (and in class last week) I featured some Easter stamp sets/bundles. I’m going to share my first card today — come back tomorrow for Card 2! It’s going to be a super-quick post today because I’m already at work, waiting for my first patient to arrive. That being said, I may not have a whole lot of details to include because of time constraints!
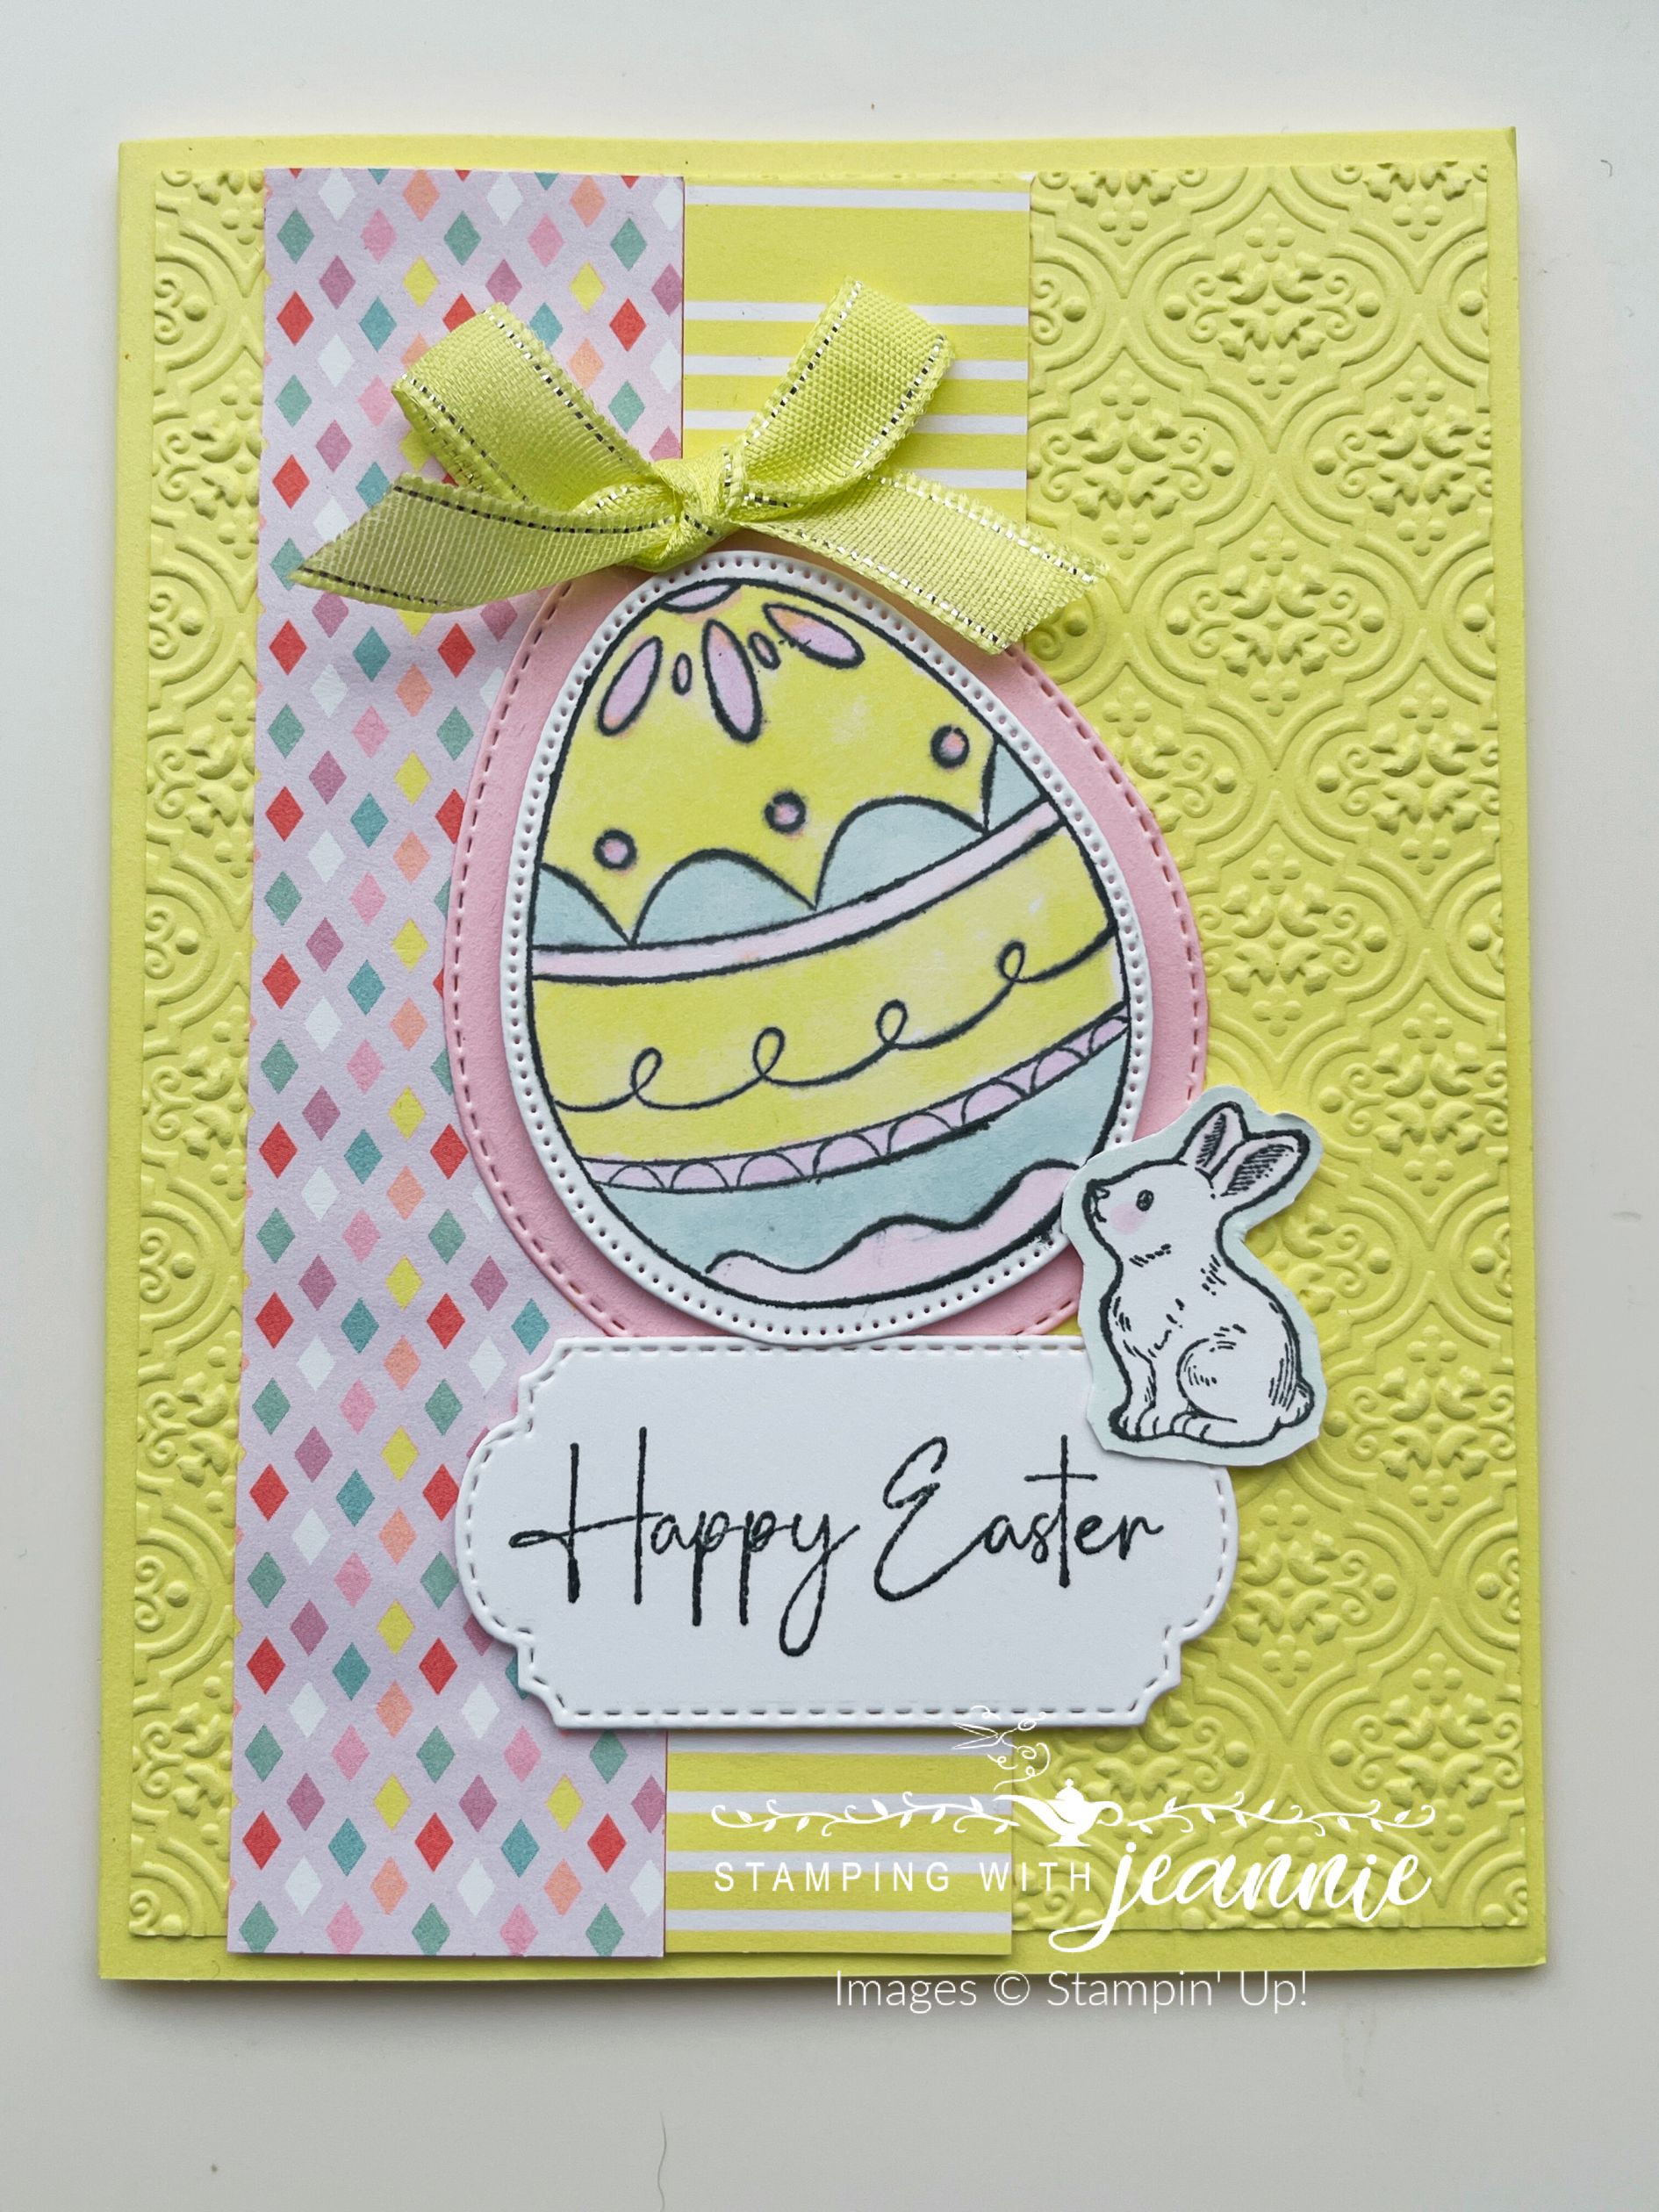
As hinted in the title, this card features the new Excellent Eggs bundle. (I’m going to link the YouTube video later in this post too so you can watch and duplicate the card.) This stamp set is so cute with two different egg STAMP options, and even more die options.

I just love this card in Lemon Lolly — sunshine, Easter, new beginnings, all of the above! The card base is 5-1/2″ x 8-1/2″, scored at 4-1/4″. Then, I embossed a 2nd layer of Lemon Lolly, 4″ x 5-1/4″, with the Distressed Tile embossing folder. To me, it looked “Easter-egg-like”, if there is such a thing!
The designer paper layers are both from the Lighter than Air 6″ x 6″ DSP. The pink-patterned paper is 1-1/4″ x 5-1/4″, and the yellow-striped pattern paper is 1″ wide and also 5-1/4″ tall. I adhered them to the embossed layer, side-by-side.

The next step is to stamp the decorative egg on a scrap of Basic White CS. I used the Lemon Lolly, Bubble Bath, Fresh Freesia and Balmy Blue stampin’ blends to color the egg. You can change the colors or the order in which you color to change the whole look. You could even make it a bright Easter egg with bold colors — then, maybe substitute the Brights 6″ x 6″ DSP stack.
After coloring, you’re ready to diecut with the coordinating die. Cut out the colored egg, and a slightly larger egg from Bubble Bath DSP to mat your colored egg. Easy-peasy!
I stamped the bunny — it didn’t require much coloring at all. I added a little bit of pink to the ears and cheeks, then just colored around the image with the light Pool Party stampin’ blend to highlight it. I fussy-cut the bunny, but … guess what?! There’s a die for that! No worries — it wasn’t that difficult. Maybe a little embarrassing that someone on my Facebook Live had to leave a comment for me to discover it LOL!
My sentiment was stamped on one of the Thoughtful Expressions dies with Memento ink. If you don’t have these dies, just keep your fingers crossed that Stampin’ Up! will honor the many many requests that demonstrators are sending in to keep these dies as an Online Exclusive product. We’ll see what they say!
I almost forgot to talk about the lovely sheer ribbon combo pack. It comes in 3 luscious colors: Lemon Lolly, Bubble Bath and Azure Afternoon. I love this ribbon and wish there were more than 5 yards per spool! I used a short length of the Lemon Lolly ribbon and tied it into a bow, attaching it to the top of the egg with a simple glue dot.
The colored egg is popped up with dimensionals to the Bubble Bath egg mat. I popped up the bunny and the sentiment label too!
The card was simple and quick to make — you can make it in just a few minutes following the cuts/measurements I included above!
Here’s the complete video (with all 4 cards) if you’d like to watch it. Make sure to subscribe to my YouTube channel to be notified of other videos I produce. I’m rather new to the consistent posting here on my blog! Stampin’ Up! is unfortunately not my full-time job … my full-time love maybe though LOL!
Hopefully you have a chance to watch this and maybe even make the card if you already have the bundle. If you don’t, put it on your list for next year — it’s retiring next month!
If you do try it, I hope you’ll share with me! Leave me a comment and share with me!
By the way, there’s a supply list down under this post. Like I said above, you can’t order the Thoughtful Expressions dies right now. I hope they really DO come back the end of April and even beyond!

<div><div><div id="abfdaace-8656-4086-a27d-7fa8b1c34b04"><iframe class="iframe-showcase" src="https://mystampinblog.com/Showcase/Details/edd28964-ca7b-41a4-9f72-ddc48d24ca25?layout=Tiled&showSku=True&showPrice=True&showSalePrice=True&showAddToCart=False&showAddAllToCart=True&showDownload=True&transparent=False&bordered=True&hFontHeight=14&rFontHeight=13&imageHeight=120&middleContent=False" frameborder="0" scrolling="no" allowtransparency="true" loading="lazy" style="width:100%"></iframe></div><script src="https://mystampinblog.com/Script/ShowcaseDetailsScript"></script></div></div>
