Last Thursday, I did a FB live featuring Petal Park. I wanted to share 2 cards (the same cards!) that I made in two different shades of blue! First, let me show 3 of the 4 cards we’re making in class this week (and that I featured), and then I’ll get into more detail.

I love all of these cards! I discovered while preparing for my FB live (and my class), that I was suddenly short of Balmy Blue. How did that happen?! All of a sudden, I went from an extra pack to … 1 sheet left! Yikes!
So, I had to get creative. I decided that maybe I could show the Balmy Blue card in yet another shade of blue. Check out the result below:
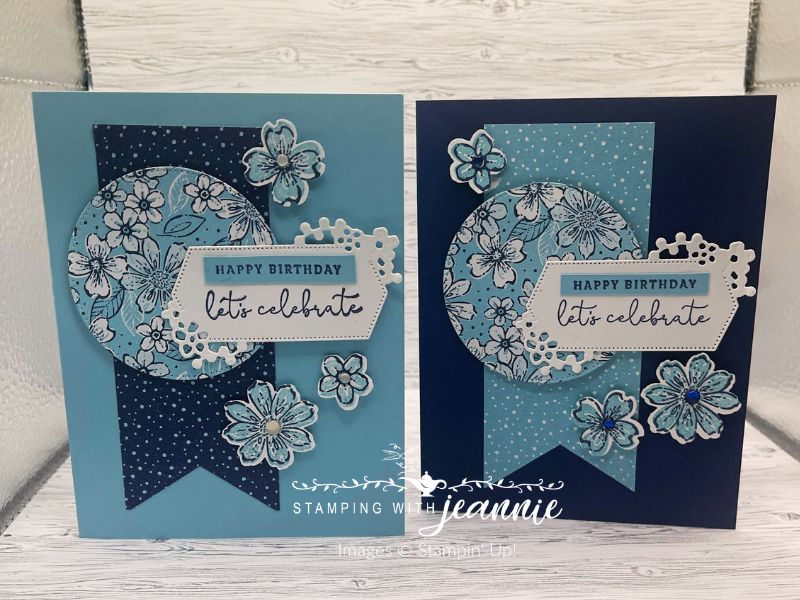
What do you think? Which one do you like better? Let me tell you just a little bit more about each one.
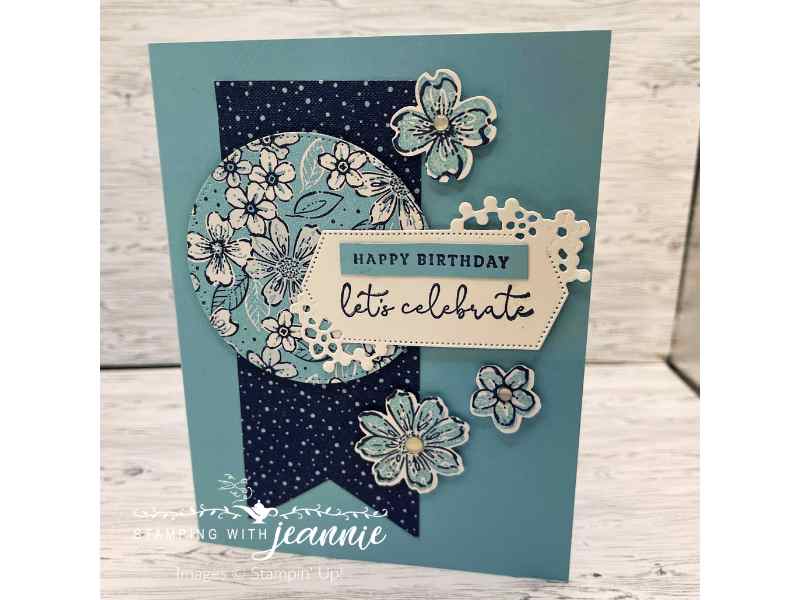
This is the Balmy Blue original card. I love it, but I was starting to second guess the balmy blue designer paper circle and the balmy blue individually stamped flowers. Was it too much light blue on blue?
I love the label — it’s from Sentimental Park and is the smallest label diecut (there is a plain label, but I liked the flowers. The designer paper is the Regency Park 6×6 designer series paper — we already know that it’s retiring on May 3rd or when supplies run out. I think I like this paper because it reminds me of sewing for my kids (particularly my daughter) when she was young. I’d shop the aisles of the local fabric store looking and choosing the perfect calico for a dress or top for her. I like this PARTICULAR blue because it reminds me of the Delft blue I collect (being Dutch and all LOL!).

Here you see a closeup of the card — the flowers are stamped in Night of Navy (as is the sentiment), then I used the solid stamp in Balmy Blue ink for the insides of the flowers. It’s actually one individual stamp, with one individual die, which cuts 3 individual flowers. Handy, right? My inside solid flowers aren’t perfectly lined up with the outline outside, but I feel like that’s okay … and if someone criticizes your stamping, they’re not worth your special card, right?!
Now, here’s the Night of Navy card. I almost think I like it better.
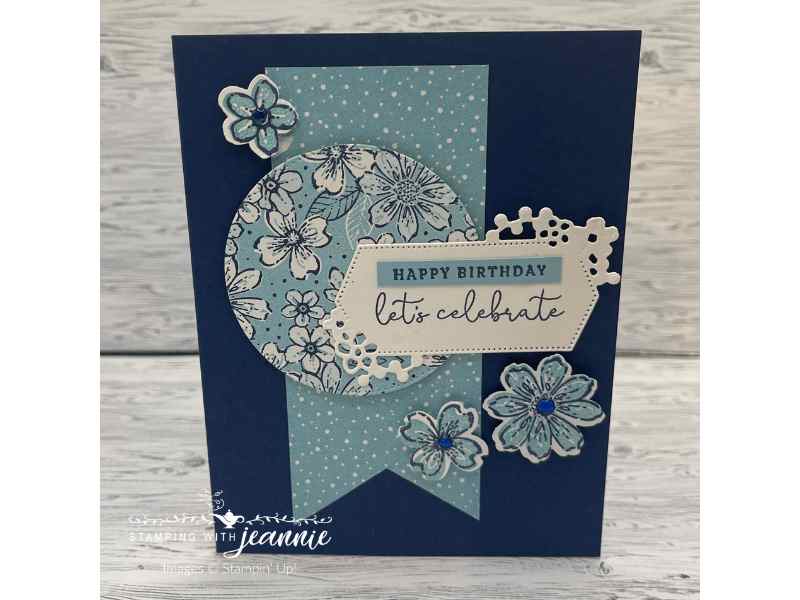
Once again, the card base is Night of Navy, and I used an alternate lighter blue pattern for the banner. By the way, the banner is 2″ wide — I cut the fork in it with the retired banner punch. Do you have punches that you just won’t part with? This is mine (if I had to pick one to take with me to a deserted island!). Again, I stamped the label with the sentiment from Sentimental Park in Night of Navy ink. The tiny Happy Birthday is from that set too. I took a 1/2″ scrap of Balmy Blue, stamped it in NIght of Navy, then cut around the sentiment with my paper snips.

In the closeup above, you see that I accented the flowers with the Adhesive Milky Dots. These dots disappeared pretty early in the Mini Catalog stages. Luckily I’m a demonstrator so I was able to preorder them to have on hand just for this class! Instead of the Milky Dots, maybe color the Irridescent Rhinestones or Pearls with a Balmy Blue or NIght of Navy blend to add some color!
Check out my product list below — it links directly to my store so you can order them. I’m also including the project measurements below.
Directions:
- Cut and score card base, 5 1/2″ x 8 1/2″ at 4 1/4″
- Choose a pattern from the Regency Park DSP and cut a strip, 2″ x 4 3/4″. Fork the end of the banner and attach to the card base.
- Choose another DSP pattern and diecut the 2nd largest circle from the Stylish Shapes dies. Pop up with dimensionals in the center left of the card as pictured above.
- Diecut a Basic White smallest ornate label from the Sentimental Park bundle, then stamp a sentiment from the Sentimental Park stamp set in Night of Navy ink. Stamp it lower on the label so you have room for the small sentiment above.
- From a 1/2″ wide scrap of Balmy Blue ink, stamp the “Happy Birthday” sentiment, then cut around it with paper snips. Attach above the larger sentiment as pictured. Attach the label to the card base, overlapping the diecut circle. (I popped up the right side of the diecut because the left side was already bumped up by the circle.)
- On a scrap of Basic White, stamp the 3 flower outline image in Night of Navy ink. Stamp the solid 3 flower stamp image in Balmy Blue ink. *Because the stamp set is photopolymer, it’s pretty easy to line up! Punch out the flowers with the Petal Park Builder Punch, then pop them up with dimensionals. Add rhinestones, Milky Dots or other embellishment of your choice to the flower centers.
- Don’t forget to stamp your inside and envelope! I didn’t show that, but I’m trying really really hard to be better about that this year!
If you want to watch my YouTube video and see all of the cards that I made with this bundle, here’s the link:
Oh yes, make sure you leave me a comment and let me know which card color you like better! Would you choose the NIght of Navy card or the Balmy Blue one?! Inquiring minds want to know!
Stampin’ hugs from the “Lamp”,