Stampin’ Up! has a new online exclusive offer for March called Irresistible Blooms. I had fun playing with this stamp set and die bundle plus the new fabulous 6×6″ designer paper.
There are several lovely pages in the 6×6 paper pack – greens and blues or pinks and yellows primarily, all blended together in “cloudy” shades. There are also outline flowers even in white on these lovely shades, the perfect size for diecutting with the Irresistible Blooms dies! With 4 sheets of each pattern, and a total of 48 sheets in the pack!, there is no shortage of ideas for use with the Hello, Irresistible designer paper. I counted 9 flowers on both a peachy-yellow shaded paper or a reddish-pink shaded paper, meaning that there are 72 (!) flowers that you can cut out for use! Wow!
Stampin’ Up! announced that there are both new and returning colors in this paper pack: Daffodil Delight, Flirty Flamingo, Lost Lagoon, Petal Pink, Pretty Peacock, Soft Sea Foam. What?! Lost Lagoon and Pretty Peacock?! That’s right – Stampin’ Up! has announced that this year will be a Color Refresh year — we’ll see new colors and even potentially past In Colors returning to the lineup with the new catalog in May (or April for demonstrators!). Do you remember Pretty Peacock? It was a gorgeous blue/green color, deep like Early Evergreen but with more blue in the shade. I remember being sad that it was retiring … and knowing that it was a color that I wished to keep. I ordered a pack of the cardstock for my own use. Well, guess what?! I now have that paper for early use with this bundle!
Check out the card I made with the designer paper. I started with a 8 1/2″ x 5 1/2″ cardstock base, scored at 4 1/4″. Next, I added a piece of Hello, Irresistible designer paper that is the Pretty Peacock shade, 3 3/4″ x 5″. Do you see the beautiful flower shadows at the bottom of the paper? I chose to highlight that by spotlighting it in the window of the lovely diecut.
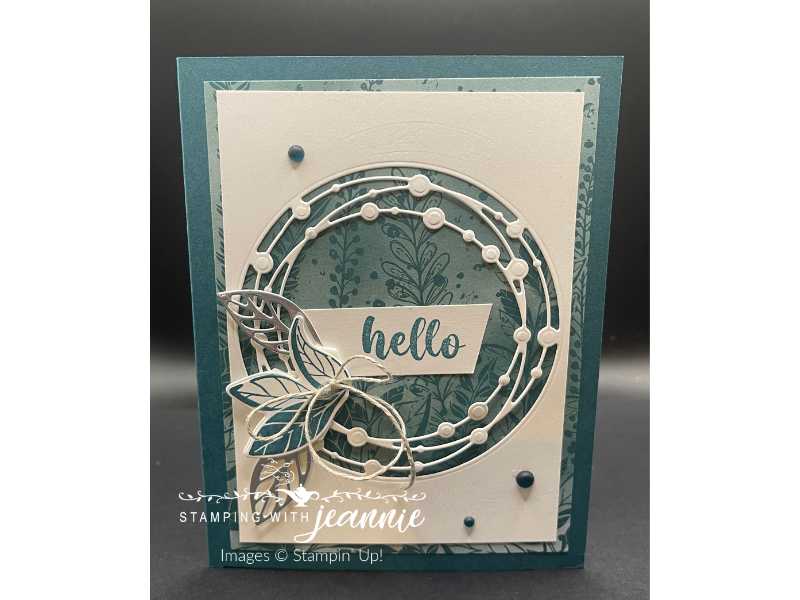
The paper on top is Basic White that is 3 1/2″ x 4 3/4″. I diecut it, then adhered it over top of the deisgner paper. In one example (not this card I guess!), I bumped up this layer over the designer paper with dimensionals. That is up to you! I think I prefer that to better see the image in the diecut “window”. Next, on a scrap of Basic White cardstock, I stamped the trio of leaves images an diecut that with the coordinating die. I added 2 detailed die silver foil leaves around the leaf image, then finally ended with the sentiment stamped on a 3/4″ strip of Basic White cardstock and adhered to the center of the diecut circle.

Oh, and I can’t forget the loose frosted dots that I added for visual interest! I love the dots, but certainly wish they were adhesive-backed like many of Stampin’ Up!’s embellishments now! Unfortuantely they are not available now, but there are several other options: pearls, rhinestones, and I even think the In Color dots matching the outgoing In Colors would match nicely! Pick up the dots (if not adhesive-backed) with the Take Your Pick tool and add them to the Basic White cardstock layer in random places. Three dots is usually the number preferred for artistic reasons — any less than that looks odd at times! I put a dot of Multipurpose Glue on the paper, then added the dots picked up with my tool.

I hope you invest in this wonderful stamp set before it’s gone! This online exclusive is limited to “while supplies last!”! Run, don’t walk to my stamping store!
Stamping hugs from “the lamp”,